I had this question asked at my recent Bio-X training, and wanted to provide a thorough answer to it, as this is a common need:
Assume we have multiple images, or multiple stacks, and we want to analyze something like the intensity through stack A vs. stack B. We don’t want to convert the stacks into an RGB image, as this loses flexibility and image resolution. Here is a step by step example of how to do this:
Create a Demo Image Set
- We will be working in Fiji, which can be found here.
- Select File -> Open Samples -> Fly Brain. This will give us a 2 channel stack image, that we will convert into an example image to import.

- Select Image menu -> Color -> Split Channels. We now have Red, Green and Blue channels. Close the Blue channel as no blue data exists.
- We are left with two z stacks of red and green, that are 8 bit. To prove our processing later on works in 16bit, let’s convert the two images into 16 bit and adjust their intensity values.
- Select the Green image, then Image menu -> Type – 16 Bit. Next we will increase the numeric value of the image data, so that we can later confirm our measurement results are in 16 bit space.
- Select Process -> Math -> Multiply – set the value to 255 and click OK. When prompted click OK to process all images in the stack.
- Repeat this process for the Red image stack. Save both files as Green and Red.
- We now have two stack files that are ready to be used as examples for color merging. Hopefully this also shows some use of the math and bit depth controls.
Merge Multiple Channels
- Open both Red and Green stacks if you have closed them.
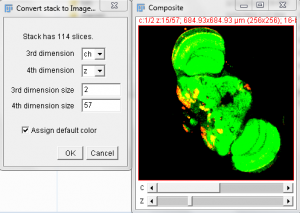
- Click Image -> Color -> Merge Channels. You now have a multi-Z data set, with two 16 bit channels. The top slider controls the channel that you are working on or are measuring on.
- Note the intensity values reported in the main toolbar reflect the active channel selected.
Image 5-D
- You may note that in the image stack we have created, the threshold tool doesn’t work. In order to threshold this image we will move it into the “Image 5-D” plugin. (included with Fiji)
- With the Merged stack set open, select the Plugins Menu -> Image5D -> Stack to Image5D. Note the resulting image can be altered for each color and scaled for display.
- There is now a active-channel selection radio button, available on the right side of the 5D stack. Click on the channel you’d like to threshold, then try adjusting the threshold for the image.
- Note you can adjust the threshold for channel A and then adjust for channel B.
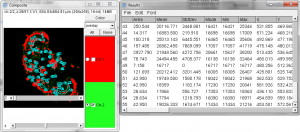
- Try an analysis using Analyze Particles. Note that the measurements provided for the active channel are in 16 bit values!

Multi-channel visualization tools available in Fiji do require a few more operations than commercially available software, however the method used in Fiji is very straightforward. One can imagine the ease of script development using these tools, which is the optimum means of analysis. I am planning to explore other tools available in Fiji as time allows, and I encourage anyone using this version of imagej to do some thorough exploring of the menus, as it is extremely comprehensive and well thought out!
– Austin


Comments
2 responses to “Merging multiple channels in Fiji”
I found this instruction very helpful, thank you! What I am still wondering about is if there is a way to quantify the number of overlapping cells across the two channels I combined, while not counting those which only exist within one of the merged channels. Can I this within the Fiji application, or is there a plug-in I could install?
Hi Hawthorne, Apologies for the slow reply – yes there is a way to do this.
1. set a “color threshold” which uses the brightnesses of channels A & B.
2. when performing the particle count, set restricting filters to only include cell shapes for your work.
3. run the particle ID, and you’ll obtain the # of resulting objects which (should be) cells.
there are caveats to this but this is the general procedure.