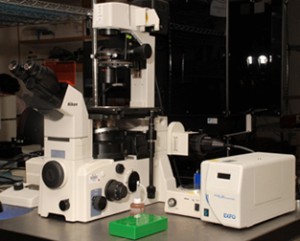
Over time, every portion of your imaging system will begin to show signs of wear. Over a few years and a few thousand hours of use, you may not notice the small changes occurring in your system, but they can add up to a major performance difference from when it was new. Here are a few simple things to look at for any system a year or more old:
Excitation and Delivery of Light

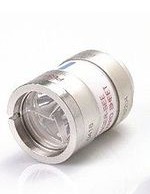
Most users and owners of fluorescent scopes are unaware that the typical excitation lamp will lose 50% of it’s output over the first 50% of it’s life. This means that when the bulb is only “half used”, your exposure times will need to double in order to produce similar signal to noise that you collected when the bulb was new! If you are using your instrument for multi-point scanning, this time delay can translate into a major slowdown.
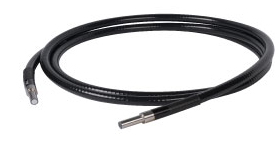
Another problem is caused by the liquid light guides most modern systems use to deliver excitation light into the microscope. These light guides contain a gel, which will harden and eventually crack as UV excitation energy cures

it over time. This usually occurs in the amount of time it takes one bulb to run it’s life, so when you replace the bulb, replace the LLG. You can find these from the light source supplier, as well as optomech suppliers like Thor. These guides are usually $150-$350 US, so not that much, but I’ve seen cases where no light at all would pass through a badly cured LLG. Replacing both the bulb and LLG will usually run less than $1,000 US, but it’s well worth the cost to keep this portion of the system at optimal performance.
Fluorescent Filters

Older soft coat filters are known to decay and un-bond over time. This is due to the absorption of the filter, and the corresponding heat buildup on the filter itself. You can identify well worn filters by removing them from a filter cube and observing a ceiling light through the filter. If you see haze or soft focal spots through the filter, it should be replaced.
Many microscopes sold today, as well as over the past few years, still use traditional soft coat filters. You can realize a 15-25% total efficiency improvement simply by moving over to hardcoat filters. (Semrock and Chroma both make hardcoat filter variants). So even if your filters look good, if they aren’t hardcoat filters, I’d upgrade em’.
Bearings, Leadscrews and Pulleys
 The internal motion components of a microscope take a lot of abuse over the years. From simple rough use, to dust, oxidization and breakdown of grease, and time, the wear on the internal mechanisms of a microscope will increase until you begin to spall and finally break gear teeth, screw threads and mounts. Normally breakage isn’t seen for quite some time, but obtaining a complete service for you scope will save you a lot of downtime and money, by identifying small problems before they become big problems. Keep in mind that those big problems get harder to fix as the scope ages, as the older anything is, the harder it is to find parts for it. Any reputable factory service department or your local dealer should offer this service for a modest price. As a guy who is wary of being up-sold by service reps for home appliances, cars and the like, I must say this isn’t one of those scenarios in my company. Time and time again we’ve found small problems before they became big. We’d actually be paid more if we let things decay and break! So having your scope on a regular service schedule is an important part of monitoring it’s condition. All the fancy motorized imaging gear in the world is useless if the optic train is trashed.
In addition, you’ll find that the leadscrews used to position motorized stages will wear out over time. A simple test for run out can be performed by placing two distant points in your imaging software, and creating a timelapse experiment where your system moves to points one and two, acquiring images at each location. After doing this for 30 or so repetitions you can play back the locations over time. You should see almost zero drift over the course of this test. Drift, or especially an oscillating pattern, indicates a problem with the mechanics or sensors on the stage system.
Software, Firmware and Drivers
It’s not a bad idea to investigate whether new firmware and/or drivers are available for your imaging components. cameras especially will benefit from firmware updates. In some cases firmware updates will resolve bugs found, but in others, especially in the Andor line of cameras, tend to unlock new capabilities as the engineers figure out how to squeeze more performance from a given camera design. There are things to watch out for before diving headlong into a firmware update, so I recommend you read my post on this subject if you’re interested.
Summary
Taking the opportunity to review how your imaging system is doing once a year will keep you familiar with it’s condition, allow you to find small problems and address them, and ensure that you obtain the best possible performance from your instrument. I’ve seen scenarios where systems have become unusable, because a combination of the factors I described above all combined to reduce the overall system performance to 10% of it’s original throughput. While this is an extreme case, I almost frequently recommend to customers that they upgrade some or all of these parts when buying a costly new component for a scope. The small cost for these items can realize a huge benefit. So take a scrutinizing eye to your instrument, and bring it’s performance up to your expectations!
-Austin
Comments
3 responses to “Updating a used imaging system: Filters, Light Sources, LLG’s and More”
I think liquid light guides are actually filled with saline, as once told by an EXFO rep. I think it’s the reflective coating that cracks on the inside over time or with significant bending. It’s not uncommon to find them with bubbles in them that can move around, either. Just my 2 cents.
Interesting Lauren,
The next time I get my hands on a dead one I’ll cut it open and see what’s inside. I assumed it was a gel, and have also seen bubbles due to overheating.
-Austin
Post pictures when you do!