I’ve been working with Pt Grey (now FLIR) cameras for a few years now, and one nagging question in the back of my mind has been whether or not it is possible to cool them via external means. There are basically 3 categories of cooling when it comes to low light cameras:
- no cooling whatsoever
- cooling to + or – some delta from ambient
- fixed-temperature cooling to some set point.
Of these methods, the fixed temp cooling is the most difficult to achieve, for a number of reasons, and I don’t believe these types of cameras would benefit greatly from such an attempt, so my idea was to simply answer the question, “Will cooling improve the performance of these cameras in a measurable way?”
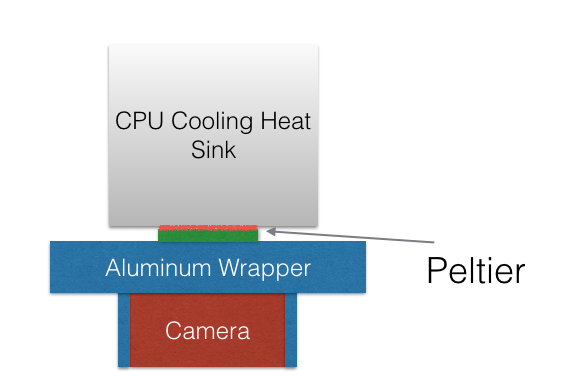
Normally, the cooling of a sensor takes place as close as possible to the back side of the sensor itself. In this case, I started with an already-encased camera, the Pt Grey Chameleon 3. Because I didn’t have access to the sensor back directly, I figured making contact with the case, at as much surface as possible, would suffice. In order to do that I simply used 2 l channel strips of aluminum, and placed thermal tape on all 3 sides touching the camera. The graphic below shows what was added after the aluminum wrapper. First, a peltier (thermo-electric heat exchanger) was coupled to the aluminum. From there, a large CPU heat sink/cooler was attached to the hot side of the TEC. The general idea here is that the aluminum should absorb the heat from the camera. The peltier moves a lot of that heat to the CPU cooler, which radiates the heat into the air. This is a rather rudimentary setup, but it works for the proof of concept.
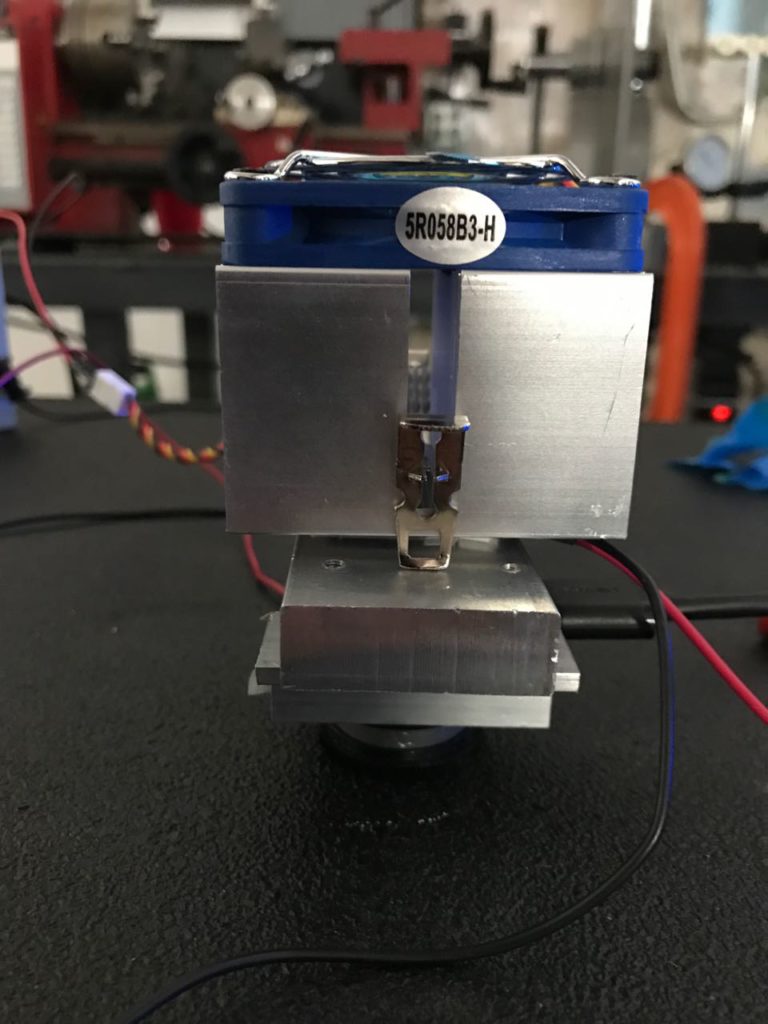
Below is an image of the assembled system. To provide the required 5V and 12V power to the cooler and peltier, I used my old reliable ATX Power supply. This assembly low cost components from Amazon and the like. I think the total cost was $27 or so. Maybe more including thermal tape.
So how did the system perform?
First I allowed the stack to heat up for ~ 30 minutes. I wanted the camera to heat-soak the wrapper, so that when cooling was applied any measurable change could be collected. I think the act of adding the non-powered stack aided in the camera performance a bit, as simply having the radiator attached means that the hot camera can cool more readily from greater surface area exposure. In any case, a thermal camera was used in timelapse mode to collect the change in temperature over time. The recording was started after 30 minutes of warm-up. Images from the thermal camera were captured during a 1 hour period, while the camera was run in timelapse mode using Micro-Manager 1.4. First, here’s a GIF showing a time-compressed thermal image.
Several things to note here. One is the large drop in camera body temp during the experiment. Another is the subsequent increase in radiator temperature, as it works to shunt the heat from the peltier. Also note the wings on each side of the camera body. They start at a similar temp as the camera body, then drop in temperature significantly (40-50°F) over the duration of the timelapse. It’s important to also note that the emissivity of the plastic camera body differs from that of the aluminum. As a result, even if the temperature is exactly the same, a slight difference in the IR image will be visible.
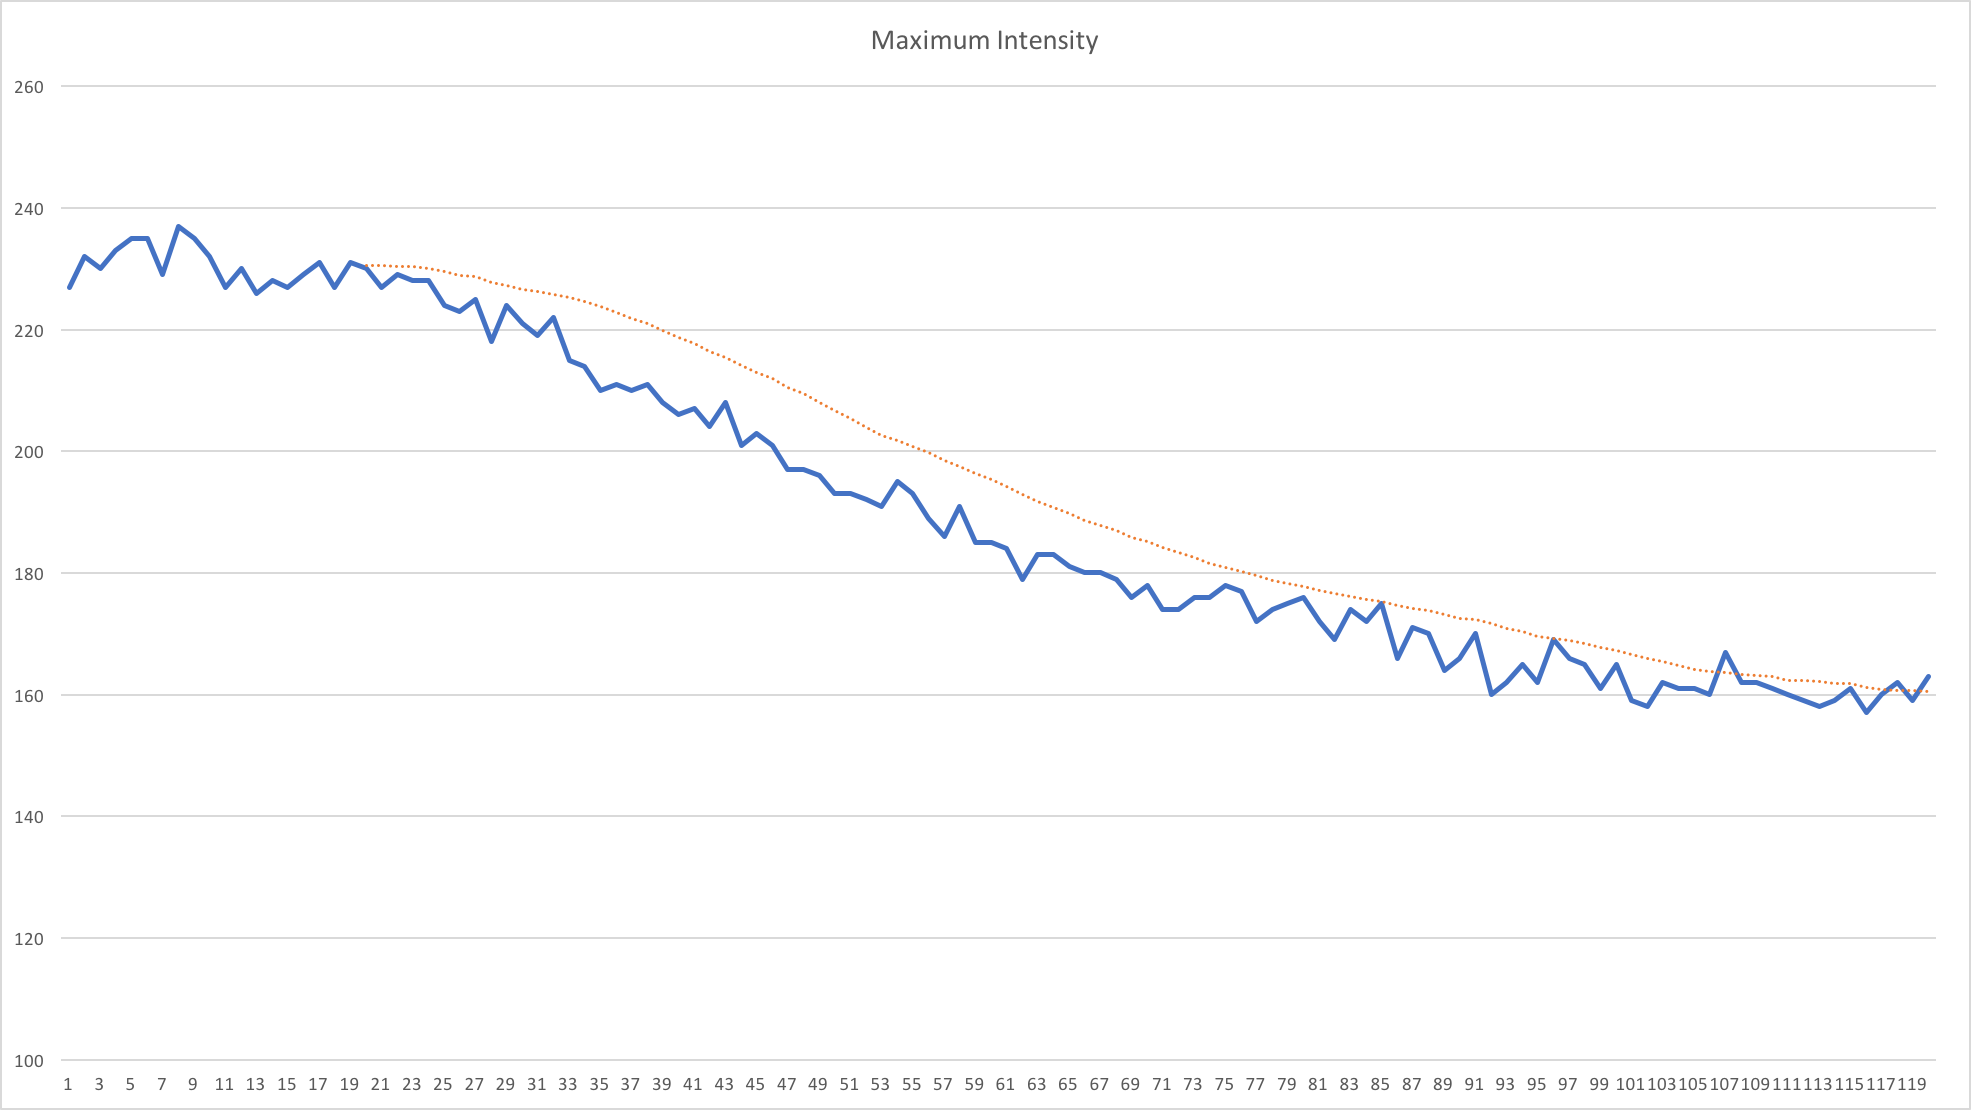
Below are the results of the image captures. First is a graph showing maximum measured intensity of any pixel in-frame, over the duration of the timelapse (120 frames @ 30Seconds interval). In the case of “hot pixels”, as the camera temperature decreases, the collected signal from those pixels drops.
Next, I wanted to measure the total # of hot pixels. Now, it’s somewhat nebulous to define a hot pixel, but I used anything 1.5x greater in intensity than the minimum background, or offset, of the image. On this experiment, the average background was ~ 14, resulting in a threshold of 21. I was really surprised by this one. There is a rather large spike in the data, and I’m not certain what that is from. However, this again shows that the cooling is indeed reducing the hot pixel count, as would be expected. Additionally, the count can be seen to normalize at around 1500 pixels, which I expect is where the system started to thermal stabilize.
![]()
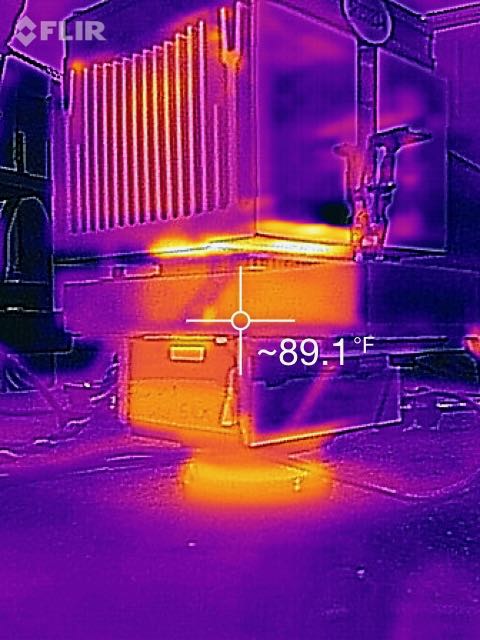
For a final set of interesting images. Here’s a shot of the stack after the experiment finished. Note the low temp of the wings and the back wrapper block.
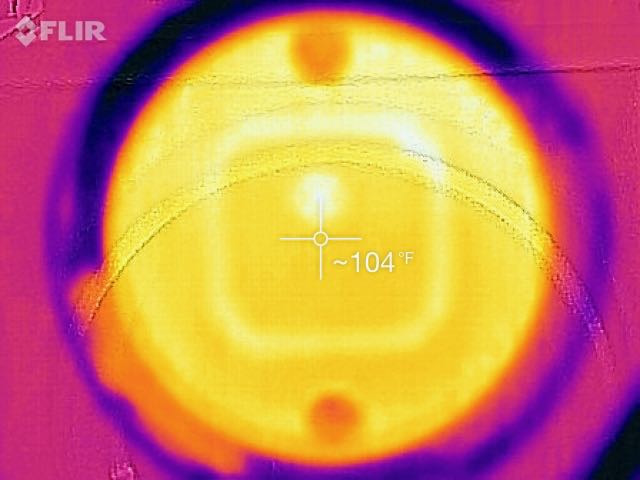
Another interesting shot, this one of the sensor face. Using the cooling system it was at 104°F.
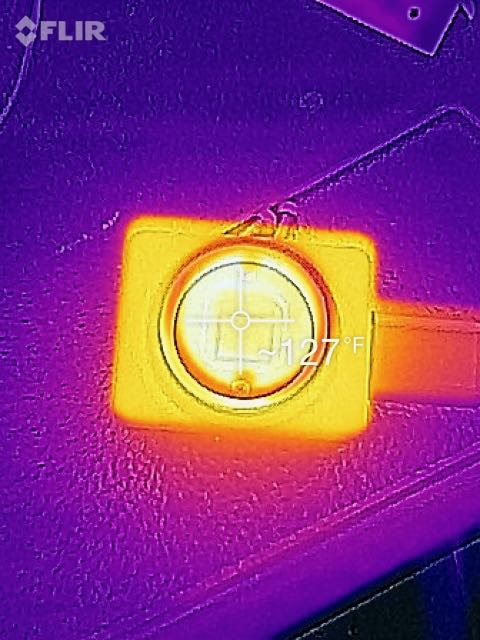
Turning the system off produced a temp of ~ 130°F.
My conclusion is that it is possible to cool even encased cameras using external cooling methods, to improve the performance of the camera(s). I do not think such adaptation will yield comparable results to a camera designed with cooling from the start, but this is an interesting option to achieve better results from a camera with a low price point.
-Austin