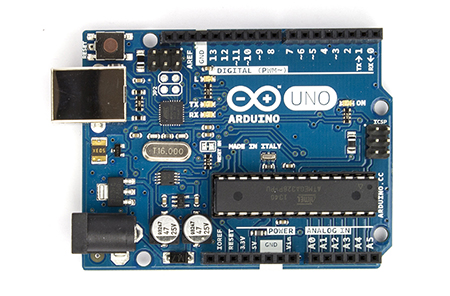
I’ve had a chance to play with an Arduino Uno for the last few weeks. It’s a really neat programmable controller.

So what is an Arduino, and why would anyone want to play with one? In short, an Arduino can be thought of as a simple-to-program standalone computer. The computer is a well established one, known as a micrcontroller, and is built for the specific purpose of interacting with the real world via sensing and controlling things.
Underneath the Arduino layer is a high speed programmable microcontroller made by Atmel, the megaAVR. For the typical tinkerer to learn about and use such a microcontroller is a tall order. This is where the Arduino layer comes into play. The Arduino architechture placed this microcontroller on a predesigned PCB, taps a number of IO lines, and provides simple connections to them, and provides a power supply and communication point via USB, and an external DC power connection. The Arduino software gives the new user a simple coding interface, which is then converted to the language used in the ATmega chip, all done behind the scenes. This ends up giving the tinkere an extremely powerful, programmable package, for a low price, with a low barrier to entry.
As an example of what the arduino can do, I decided to write a “sketch” for solving a common microscopy problem. I have a camera, and a high speed light switching system. I want the camera to run as fast as possible, let’s say at 30FPS, and I want the light source to switch from one channel to another while the camera runs. This is considered “hardware device streaming”. In order to do this – I’ll tap the camera’s “frame transfer” line, which provides a TTL High signal during image transfer. This is the time when you want to move hardware, as the camera isn’t actively acquiring data while a transfer is occurring, or rather while a frame shift is occurring.
For this test I used an Andor Clara, and was able to obtain framerates of 100fps with no jitter. In order to accomplish this I used an interrupt driven method of sensing the input voltage line on the uno. If using the loop code in a traditional sense (polling mode) the litter form the timing of the loop affects the response time of the processor, and thus a timing jitter is seen in the control over the devices triggered.
If using an interrupt, the timing is FAR more accurate, i.e. fast enough that I couldn’t detect jitter when running the camera @ 100fps. Theoretically this code should be stable to ~ 500fps or so. If you’d like to try this code, it is hosted here.
Another example of what the arduino can be used for is serial communication with existing software applications. Say for example you have a program which will operate with Uniblitz shutters. The uniblitz protocol is usually one way – meaning the shutter isn;t replying back to the software as to whether or not it’s open. Because of this most programs can issue the “open” or “close” command without having an actual uniblitz controller connected. One could program an Arduino to accept these commands, and do something with them, for instance trigger a TTL driven laser to turn on. An example of some modified Serial Comm code which will trigger TTL outputs when recieving an “S1” or “S2” serial command, can be found here.
I can imagine numerous applications for this device. Motion control, illumination control, software triggering based on an input, or many otehr things. Considering how much a NI device costs, and this costs $29 complete, and is quite configurable from an open scripting code, I think this is a steal for it’s capability.
-Austin